Pages

Thursday, June 13, 2013

Ottoman/ Coffee Table

My husband has been angling for a new coffee table ever since...well, ever since he lost the battle for  choosing the first one.

Our current table was looking a bit worn and dinged up, so I gave him free reign to come up with our next one. He had pinned this DIY Ikea table blog a while back and it seemed like a good fit for our living room.

Ikea Lack side table upholstered ottomans

 You can follow the link to the original blog by clicking on the picture above.


First, we started with one of the Lack Ikea tables for $8-$10. The black/brown color that matches our tv stand was the more expensive of the two (a fact that we learned only after we walked 3.75 miles around a one-way Ikea-shaped maze).


The other blogs we researched showed how to cut the foam from large sheets sold at Home Depot, in order to save money; however, what we didn't like was the wasted foam edges. Enter Joanns! During one of our weekly trips, we noticed they stocked pre-cut foam,and best of all, the size was almost perfect! (the lack table is 21-5/8" x 21-5/8", and the foam was 22" x 22") We decided on the high-density version of the foam as it would deflect less for placing plates and glasses on it.


After aligning the foam and table top, we discovered that the slight difference in size gave the table a flared effect which we kind of liked. We used a spray adhesive to fix the foam to the tabletop, which provides a secure fit.


Need to be sure that it is comfortable... ahhh!

Next, we bought some batting to soften the edges of the foam and the tabletop.


We used the staple gun to mount the batting on the underside of the table.


Be sure to trim the excess batting on all edges and around the mounting holes for the legs.


Next we chose a heavy duty fabric to finish the ottoman.


We started stapling the material on one edge. Then pull the material taut opposite the first side and staple into place. Be sure the material is being pulled evenly so you do not end up with any strange creases in the top.


My hubby knows his way around a staple gun!

How to finish the last two sides? Here are a series of pictures showing how we folded the corners to ensure a smooth and neat finish.


First we pulled the material flat around the corner.


We stapled the material down to the corner to fix it into place.


Next we pulled the material taut along its long edge.

  
We folded the material along the edge of the corner.


We then folded the material over to the bottom of the tabletop.


Staple in place.


Repeat on last side.


Be sure to trim the excess material away and the clear the material from the mounting holes for the legs. We had to use a utility knife and a hole punch to clear the holes sufficiently.
Next, mount the legs according to the IKEA instructions.


We chose to cut our legs shorter to match the height of our couch. FYI, the insides of the LACK legs are hollow. If you want to prevent the legs from scratching your floors, you may want to look into using adhesive furniture pads or cork boards. Ours are on a carpet, so it was not an issue for us.

These work great as an ottoman, a coffee table or even a stool (though IKEA would disagree).
They are very functional and a great addition to our living room decor.

Monday, May 20, 2013

DIY Roman Shades

When we moved into our new home, the first project we undertook was to cover all the open windows.
We get alot of light in our kitchen and living room, but as much as we like looking out of the windows, we don't need people looking back in.

We came up with a simple set of curtains made from a cute shower curtain and an old curtain rod. We made a matching set for the kitchen as well. Unfortunately, they are not super-great on blocking light. Also, if someone is at the front door, they can usually get a peak inside. Not great if you are trying to avoid salespeople or other weirdos.


See all that light? Not very private.


We found a few ideas on the internet, but in the end we combined a few ideas to come up with our own.

First we gather up our supplies:
wooden dowels
29" mini blinds
white plastic rings
two kinds of fabric
 (one to face the inside of the house and the other to help filter out some of the light)
sewing thread


We also used an iron and a sewing machine. Basics like pencils, rulers and glue will also be needed.
As with any fabric project, we begin with ironing all the fabric to get out all of the sharp folded edges.


Whilst I ironed, my husband laid out the mini blinds. We really only want the strings and the main raising and lowering mechanism, so we needed to separate it from the rest of the blinds.


Starting at the base of the blinds, he started trimming the connecting strings to remove the individual blinds leaving the two longer strings at each support.


In the end, after the individual blinds are removed, this is what you will end up with.


Next, we cut the fabric to fit the size of our windows. We needed to make it about 1.5" to 2" wider than the window to allow for folding the fabric to create clean edges. When determining the height required, we had to do some math. 


You need to decide how many folds you want to have in the shade overall. For each fold and for the bottom of the shade, we used between 1.5" to 2" in additional length to account for the material wrapping around each dowel. We had the fabric covering the face of the mini blind mechanism at the top of the shade, so you will need to account for this dimension as well.


We always have our project manager on hand to make sure we are staying on task. 
Once we have the two fabrics cut to size, we sew three edges together inside out (like a pillow).


To get the most accurate dimension for the fabric wrapping the dowels, we measured the dowel in the fabric. Buzzed the line in the fabric and double checked that the dowel could still fit in the sleeve.


Once we had the accurate measurement down, we made the appropriate lines for all the folds in pencil on the fabric and started buzzing (sewing) all the lines together.


Here you can see the folds and the lines that we used to sew the folds together.


Here are the views from the front and back. 


Next, my husband got to use his favorite toy and cut the dowels down to size. We made them slightly shorter than the width of the shade so they would not be visible.


Next, we need to locate where the support lines will be attached to each dowel. Measure the distances between the support lines on the mini blinds.


At each support point on each dowel, using a simple needle and thread, sew a single plastic ring to the dowel within the fabric. The orientation of the ring should allow for the support lines to run smoothly through them running up and down behind the shades.


Finally, we get to mount the mini blind mechanism and support lines to the front door.
You will need to refer to your particular mini blind packaging to find out how to attach this all to the door. Wherever your mini blind mount ends up above the window opening, be sure to take this into consideration in the overall length of the shades.
We mounted ours a little high the first time around, so we had to mount it a few times.


Once the mini blind mechanism is mounted in the proper place, we need to attach the fabric shade itself. We decided to go with velcro since we did not want to deal with messy glues, clamps and the like. We attached one side of the velcro to the face of the mini blind mechanism and the other to the back side of the top of the fabric shade. Attach together.


Once the fabric is in place, we need to run the support lines through the plastic rings and tied into the last rings at the bottom dowel. Now you can use the pull strings from your mini blind mechanism to pull the fabric shades up and down! Like store bought Roman shades!


The great thing about the velcro is that you can take your time in getting the fabric in just the right place to hang straight.


The extra fabric makes for more light filtering. The extra width prevents anyone from peering in around the edges.


Huzzah! A professional-looking, workable privacy cover for our front door! Beautiful!

Saturday, May 11, 2013

Adventures in Landscaping

When we first bought our home, we were excited and a bit overwhelmed with the size of our yard. The front looked fairly good from the street.
I mean, the grass was green and there were some roses and bushes under the front windows.
Not too bad to look at, until you got up close and saw all the patches of crab grass and the shaggy, misshaped flowers and bushes.


It was a bit more daunting to see the back. There really was not much to work with. Alot of dry and dead grass and weeds.
But there was definitely potential here. For the sake of our small but active dogs, we knew we had to get some grass in the back for them to run on. 
(Though that never seemed to stop them from tearing across the backyard dirt...or mud, depending on the time of the year.)


After a while, my husband just could not stand the amount of crab grass in the front. It just looked uneven and whenever he tried to cut the grass, the crabgrass stubbornly would not be cut. And I could not stand the amount of dirt and mud brought into the house by our dogs. You can only clean the floors so many times in the same day before you start to get frustrated. 

So we started digging up the front yard to remove the old grass. This took a while...
I'm sure the neighbors loved looking at our house for those few months while we waited for the grass to die. 
Though the graves we dug in the front for Halloween were a hit with the kids.
We started in small steps...


The vampire pumpkins were particularly scary.


So, after Halloween, we started removing the grass in sections.


It was slow work.


In the meantime, the backyard of dead grass, weeds and dirt was enjoying a winter with some rainwater. Soon enough, the back became overrun with weeds.


And not just regular weeds, we were dealing with "cheese" weed. You cannot kill cheese weed with poison. You must smother it or pull it out by its roots.
It is particularly nasty.


Between battling the front lawn removal and the weeds overtaking the backyard, we knew it was time to just throw up our hands and turn this all over to the professionals.
We looked up a few numbers, asked around for referrals and made some calls. After getting a few bids, we decided to pass the work to our neighbor's landscape company.
They came out within a few weeks of our first meeting and got to work.
We decided to go with Bermuda grass since nearly every lawn on our block was the same and because of its durability.


They removed the weeds in our soon-to-be lawn area in both the front and back in one day. In addition to removing the old weeds and grasses, they evened out the dirt and fixed a few of our broken and misplaced sprinklers.


They laid down the sod at the end of the first day and into the second morning.


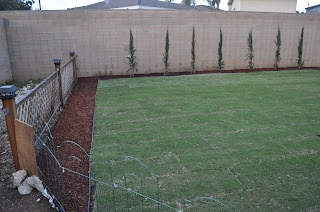
We came back the next weekend and added edging, landscaping fabric and mulch around the outside of the new lawn to give it a finished look.


We also decided to fence off the grass in the back to prevent our dogs from digging up the new lawn before it had a chance to root. Though our part-beagle Bacon decided to use some of his digging skills to get under the fence a few times. He is not the smartest dog in the world and was caught several times inside the lawn area because he could not find his way back out. 
Silly dog.


The backyard is slowly coming together. We estimate that we have completed around 50-60% of the total space back there. Only three more areas need to be completed but we are trying to spread out the costs. On the list of must-haves are a deck, pergola, fire pit, paved patio and native flower garden.


Until then, we will just have to enjoy the soft and cool grass. Or at least the dogs do...

Until next time, on the Adventures in Landscaping.....