Among some of our lush garden produce, we harvested five lovely orange butternut squash.
One went to my mother, one to our neighbor and another to a friend.
That still left two of the succulent squashes to eat at home.
Yum!
When it comes to butternut, the first recipe that comes to mind are raviolis. Silky, buttery butternut squash raviolis in butter and sage. Drool...
I found a recipe through Pinterest (of course), through another blog about eating and making real food that you can look at here. (Please note, we had to make twice as much dough to use up all the filling.)
I have never made raviolis before and as such ran off to the first kitchen store that I could to buy all the proper equipment. I love William's Sonoma and still had a gift card burning a hole in my pocket.
I wanted so bad to justify buying a new attachment to my Kitchen Aid mixer but the sales lady managed to convince me to purchase just a small ravioli cutter. Just like this one pictured here.
Costs under $15.
What a steal!
The blog has both a recipe for the filling and for the pasta. Be prepared to be busy for a few hours.
I started with preparing the butternut squash first, trimming the stem from the top and split in half. Be sure to de-seed the interiors prior to placing into the oven.
Placing the squash cut side down on an oiled pan to bake in the oven (@ 400 degrees) anywhere from 30 minutes to an hour depending on the size of the produce.
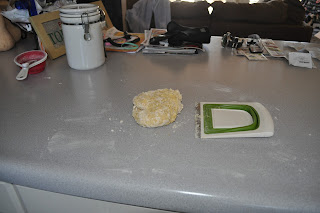
Next comes the pasta. Just a simple recipe, you can find one in any recipe book. We also got a nifty pastry cutter/scoop that came in handy for working the dough.
Once the dough became smooth and elastic, I cut it into four equal portions and let them rest on the counter under a towel.
While the dough rests, it is time to make the filling. Remove the soft filling of the squash from the skin with a spoon.
Next, mix up all the ingredients until smooth. This recipe has mascarpone, maple syrup, butter, cinnamon and nutmeg. The mascarpone makes the filling nice and smooth. Try playing with the ingredients to come up with your own recipe. Everyone's palate is a little different.
Once the filling is complete, it is time to prep the pasta. If you have a pasta press, this is the time to break it out. Otherwise, a rolling pin works just as well.
Roll out an even number of sheets and place spoonfuls of filling, evenly spaced upon one sheet. Leave enough space for at least a third of an inch all-around each spoonful to be able to seal the ravioli together. Wet the open space of dough between the fillings with water before laying down another sheet of dough on top. Press out all the air with your fingers before cutting up the raviolis.
Now it's time to use that pasta cutter! They may not come out super pretty but as long as you remove all the air from the insides and seal them well, cooking should not be any problem.
You can either boil them right away or you can freeze them for several months. Just place them on a cookie sheet in the freezer until they are frozen hard before bagging them. Be sure that they do not touch. When you bag them, place them in layers with wax or parchment paper in between the layers. Otherwise, you will just have a large blob of frozen raviolis you will have to cook all at once.
Not all of ours came out perfect, but practice makes perfect! We made two gallon-sized bags of raviolis from just one squash!
Now we just have to figure out what to make with our last squash of the season. Good thing they last!
Bon Appetit!


No comments:
Post a Comment