Spring is in the air and now it is time to turn our attention back to our gardens!
Summer fruits and vegetables are so tantalizingly close!
(We are looking at you heirloom tomatoes...)
It is not only important to pick the right kind of plants, setup an efficient watering system and remove all the weeds from our overgrown gardens, but you also have to think about attracting beneficial bugs to your own little slice of Eden.
Ladybugs are a great example of a beneficial bug for your garden. They and their offspring love to munch up lots of those nasty aphids without harming your plants.
You can purchase ladybugs from your local gardening center (call before you go since there is a very small window for ladybug sales and not everyone carries them).
But what makes the ladybugs want to hunker-down and stay a while instead of flying away once you let them loose?
Unfortunately...
Not much.
But maybe we can 'sweeten the pot' (or garden, in this case) by making them a nice house to live in. We found the following link to Martha Stewart online for this great little "cottage".
And we are underway!
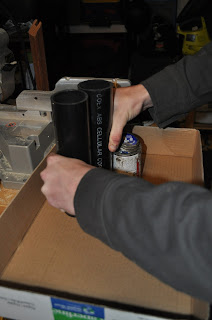
We started by cutting down some 2" to 2 1/2" diameter PVC plumbing pipes we had laying around. We chose black since it does better in the sun though we painted ours so that did not matter as much.
You may chose to make yours out of wood or metal, but most of all, be sure that it is waterproof.
We cut the pipes into three pieces, each the same length. Ours were between 10" to a foot. You can do any number of pipes that you want, depending on how big you want the ladybug house.
Next step was to glue them all together with PVC glue (we use Christy's Red Hot Blue Glue).
My husband wanted to keep them aligned to one side so he would periodically press the pieces on end down on his workbench. He is kind of a perfectionist when it comes to our projects.
Since we had a specific kind of paint job in mind, we made sure to pay attention to how our pipes lined up with one another. We wanted more of the printed text to be on the bottom of our triangular house so as not to be seen later on. Can you guess what are paint job looked like without skipping to the end?
Once all the pieces were glued together, we cut out some painter's tape to create spots for our 'ladybug' house. Be careful not to cover up any of the text with the tape since we will not be painting any of these spots later. At least if we can help it.
A little bit of spray paint later and you are nearly finished! Before the paint fully dries, remove the painter's tape spots. To complete the look, add some sticks (we used bamboo) to provide some nooks and crannies where the ladybugs can nestle into.
In the end, you can choose to hang yours (a simple string through one of the pipes would do) or just place it somewhere off the ground in your garden. Since we do not have any place from which to hang our little project, it has taken up residence on our garden fence.
We hope lots of ladybugs will grace your garden this year and for many years to come!
Look out aphids!


This comment has been removed by a blog administrator.
ReplyDelete