Pages

Thursday, December 27, 2012

Crocheted Beard

What better way to keep your face warm on those cold Southern California nights than your very own crocheted beard? It does get below 70 degrees here sometimes, I swear...

We found this link on Pinterest for a simple tutorial.

Crochet Beard Hat Pattern

Who says that women cannot rock a beard?! 
Or maybe you need a lumberjack costume?

See some pictures below of my brother, Brian, modeling his latest birthday present.


We are Giants fans in our family, if you couldn't tell.
I think he looks like either Brian Wilson or Sergio Romo. What do you think?
Either way, after this latest World Series win, this hat is doubly awesome!


I think he likes it.
Though the beard is sewn into the beanie, it is easily folded back and worn normally. Try one out for yourself!

My First Crochet Project

For my first crochet project, I found a cute little bear tutorial online.
It is super simple and super-cute. The bears are shaped like balls and have eyes and little faces stitched on with embroidery thread.


Here are a few of mine in action:


To make a koala bear, you need grey yarn (3 or 4 weight), 2.00 mm crochet hook, tapestry needle, black embroidery thread, 6 mm safety eyes, and white felt.

 The weight of the yarn will change the size of the overall bear (as long as you follow the tutorial).
Here you can see the koala was done in weight 3 yarn.


For the panda bear, you will need black and white yarn (3 or 4 weight), 2.00 mm crochet hook, tapestry needle, black embroidery thread, 6 mm safety eyes and black felt.

 The panda is made with weight 4 yarn and is much rounder than the koala.


In order to change the thread between colors, I would recommend a Russian joiner (as seen here). There are no bulky knots poking out from your bear in strange spots making the overall look very sleek.


I love these cute little guys so much, they were Christmas presents for a lot of people this year.
My Por-Por (Chinese grandmother) laughed so hard when I gave her one. She was amazed at how fast we learned how to crochet and thought they were very sweet.
We would recommend these little bears for first time crocheters!

You have never lived till you've hooked!

Crochet Beginnnings

So where to begin in the great wide world of crochet?

We really wanted to work out way to Amigurumi figures, but practice makes perfect, right?
So we began with a simple ball.
Done in teal, my favorite color of course.
Why bother just staring at boring white, when you can do it with some flare!


This website was super helpful when learning how to make simply objects.

To start a ball, you must learn two simple stitches: the magic ring and the single stitch.


Mine didn't come out too bad for a first try!


They also had heart shapes as well. These are super- cute!


Mine came out a bit lopsided, but still recognizable.


I tried a freehand object using all that I learned. I think I decided about half way through that it would be a pear. Can't have too many crocheted pears!


If you would like to try out these simple objects, you can find the free patterns in the link below.

Thursday, November 29, 2012

Pickles!

Twelve cucumber plants might have been a few too many. We tried our best to eat them or give them away. We made cucumber salsa, cucumber salad and frankly we were getting a little tired of cucumbers.
Next best thing to make with cucumbers? Pickles!
We chose to make refrigerator pickles instead of the traditional canning method. This website describes the different ways to make pickles and all the equipment that is required.
First you will need some mason jars. Be sure to clean them well. We tossed them into the dishwasher without any detergent and ran the hot water cycle. 


We prepared the cucumbers by slicing them into spears and trimming them into lengths that fit the jars (with a bit of room for the brine to cover over top).


For the brine, you can come up with alot of different recipes. A quick Google search will come up with over 90 recipes easily. Some places will even sell you a pre-made mix. You just have to decide what kind of pickles you want.  We made a relatively sweet dill pickle recipe with dill, onions, mustard seeds, sugar, and white vinegar. Simmer the brine before pouring them into the jars.


While the brine simmers, pack the mason jars with cucumber spears.


Pack them fairly tight, but with enough room to let the slivers of onion and dill to slip between them.


Pour the brine just over the tops of the pickles, but be sure there is a small gap between the liquid and the cap. Seal tight and refrigerate for at least one day.


Then, enjoy some yummy crispy pickles! These definitely were a hit with my coworkers. They worked their way through at least five jars!

Butternut Squash Raviolis

Among some of our lush garden produce, we harvested five lovely orange butternut squash.
One went to my mother, one to our neighbor and another to a friend.
That still left two of the succulent squashes to eat at home.
Yum!
When it comes to butternut, the first recipe that comes to mind are raviolis. Silky, buttery butternut squash raviolis in butter and sage. Drool...

I found a recipe through Pinterest (of course), through another blog about eating and making real food that you can look at here. (Please note, we had to make twice as much dough to use up all the filling.)

I have never made raviolis before and as such ran off to the first kitchen store that I could to buy all the proper equipment. I love William's Sonoma and still had a gift card burning a hole in my pocket.
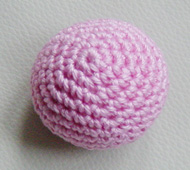
I wanted so bad to justify buying a new attachment to my Kitchen Aid mixer but the sales lady managed to convince me to purchase just a small ravioli cutter. Just like this one pictured here.
Costs under $15.


What a steal!

The blog has both a recipe for the filling and for the pasta. Be prepared to be busy for a few hours.
I started with preparing the butternut squash first, trimming the stem from the top and split in half. Be sure to de-seed the interiors prior to placing into the oven.


Placing the squash cut side down on an oiled pan to bake in the oven (@ 400 degrees) anywhere from 30 minutes to an hour depending on the size of the produce.


Next comes the pasta. Just a simple recipe, you can find one in any recipe book. We also got a nifty pastry cutter/scoop that came in handy for working the dough.


Once the dough became smooth and elastic, I cut it into four equal portions and let them rest on the counter under a towel.


While the dough rests, it is time to make the filling. Remove the soft filling of the squash from the skin with a spoon.


Next, mix up all the ingredients until smooth. This recipe has mascarpone, maple syrup, butter, cinnamon and nutmeg. The mascarpone makes the filling nice and smooth. Try playing with the ingredients to come up with your own recipe. Everyone's palate is a little different.


Once the filling is complete, it is time to prep the pasta. If you have a pasta press, this is the time to break it out. Otherwise, a rolling pin works just as well.


Roll out an even number of sheets and place spoonfuls of filling, evenly spaced upon one sheet. Leave enough space for at least a third of an inch all-around each spoonful to be able to seal the ravioli together. Wet the open space of dough between the fillings with water before laying down another sheet of dough on top. Press out all the air with your fingers before cutting up the raviolis.


Now it's time to use that pasta cutter! They may not come out super pretty but as long as you remove all the air from the insides and seal them well, cooking should not be any problem.


You can either boil them right away or you can freeze them for several months. Just place them on a cookie sheet in the freezer until they are frozen hard before bagging them. Be sure that they do not touch. When you bag them, place them in layers with wax or parchment paper in between the layers. Otherwise, you will just have a large blob of frozen raviolis you will have to cook all at once.


Not all of ours came out perfect, but practice makes perfect! We made two gallon-sized bags of raviolis from just one squash! 
Now we just have to figure out what to make with our last squash of the season. Good thing they last!
Bon Appetit!

Friday, November 9, 2012

Beer Bread (That's right you heard me)

After one of our parties, we seemed to have quite a few extra beers laying around. And since my husband is the only beer drinker in the house, I figured that there had to be a better way to get rid of some of the bottles.

Pinterest is of course the first place I looked and like always, it does not disappoint.

I found a beer bread recipe that used a whole bottle of beer.
We have tried beer battering shrimp and vegetables but it always feels like I am wasting most of the beer.
Sacrilege! No more!


The recipe is fairly simple: flour, salt, sugar, baking powder.
But for extra leavening and cohesion, they use the beer. And just about any beer will do, just depends on what you like. No eggs makes this recipe great for those with egg allergies.
Oh, and butter, lots of butter.


It both lubricates the bread pan and when poured over the top, creates a crispy buttery crust. 
Just try and keep from snacking on the crust once it comes out of the oven.

honey-beer-bread1

You can find the full recipe by clicking on the picture above. Looks good doesn't it?
Not our picture, but it look scrumptious. We wish we could have stopped ourselves from immediately taking a bite, but the bread is just too good. And there wasn't much to photograph excepts some crumbs. It wasn't pretty.

If you are worried about getting drunk from eating this bread, let me tell you that it is cooked in the oven for an hour and only contains one beer in the whole thing. Even if you eat the whole loaf, there wouldn't be much alcohol left after cooking it. There really isn't any way to get a buzz from this bread but use your own judgement.

The bread is best served warm with a drizzle of honey.
Enjoy responsibly!

Follow this link to my Pinterest cooking board.

Homemade Sun-Dried Tomatoes

Tomatoes, tomatoes, tomatoes...
Anyone who saw our garden in its first summer can attest to our voracious tomato plants. We were a little over-zealous when we made our first plantings. 
We wanted heirloom tomatoes. Lots of them.
So we planted 4 varieties, 8 plants each.
32 total.
Needless to say, it was too many.

So what to do with all those tomatoes? We tried eating our way through them, giving them away at work, and selling them at my mother-in-law's workplace. We made eighty bucks! 
We even entered one into a homegrown heavyweight contest. It was 2.6 pounds!
But we still had alot of tomatoes, like an extra 15-20 pounds a week.

So we next turned to dehydration. Sun-dried tomatoes are so yummy!
We borrowed our neighbor's Nesco dehydrator and got to it!


First, we washed some of our beautiful tomatoes from our yard and removed all the stems and unwanted bits.


Next, we cut them into even slices. Or as best we could. The slices were just under 1 centimeter thick. 


Before placing the slices on the sheets, you should be sure to remove all of the seeds and insides.


To aid in the speed and for some more flavor, salt the slices of tomatoes before starting the dehydrator. If you are feeling adventurous, try some fresh herbs. The smell in the house was mouth-watering...


The Nesco dehydrator we borrowed has at least 5 settings for different types of food. Anywhere from meat to fruit to fresh herbs. One thing it did not come with was a timer. That can easily be worked out by buying a light timer, like you would use for Christmas lights or lamps. Eight-nine hours worked for us, but some trial and error will be needed depending on the thickness of the food.


Once done, the tomatoes can be eaten straight, cooked in stews, or bagged and placed in the freezer for several months. If you want, you can pack them in oil, maybe some garlic and herbs. This will only last about 6 weeks. They are great as gifts. 
Our neighbors even got a jar when we finally returned their dehydrator at the end of the tomato season.
Win-win for everyone!
And lots of tomatoes all winter long...

Sunday, October 28, 2012

Garden Sprinklers

The sprinklers in our yard proved to be quite tricky. 
At first we thought that we only had six sprinkler heads. After switching on the water, we soon found many more and not all of them in working order. In fact, we found two lines generously watering the concrete block walls around our property about a foot down under the ground. 
Whoever decided to just run an uncapped pipe to the wall...who knows what they were thinking...
We first had to decide what zones we needed.
1. Grass
2. Vegetable Garden 
3. Flower Garden
Three solenoids (water valves) for three zones.

Each zone can be switched on or off independently from a central computer/timer. We managed to capitalize on a more energy efficient unit that ended up only being $10 after state rebates. It even has a rain catcher that would change the amount of water used for a rainy day.

For the vegetable garden, we didn't want to waste water on pathways so we decided to go with micro drippers. That meant that we needed locations of raised PVC pipes to tap into.


These locations were determined by the locations of our raised garden beds. They are great for your back and easy to tend. Each box got a PVC pipe coming up the center.


That pipe split to a tee which we then used a transition piece to switch from PVC pipe to a black flexible pipe.


This flexible black pipe is then tapped into with smaller micro-tubing that can be plugged up when not in use. The micro-tubing can be cut to whatever length is needed to reach your plants. The micro-tubing needs to be soaked with hot water in order to get around the small connectors and drippers to fit tightly. The drippers come in a range of volume released per hour. We used only two types: green drippers (2 gallons per hour) and red drippers (4 gallons per hour). There are also smaller drippers for plants that require even less water. We also used soaker tubes for smaller plants that are located closer to one another. The soaker tube has alot of small punctures along its length to basically "ooze" the water out and onto the ground.


  The pressure on the line can easily blow the connectors off if they are not connected properly as well. We tested our pressure at one of our hose bibs (spigots) with a cheap pressure gauge from the hardware store and compared it with the required max pressure allowed for the drippers. Our pressure turned out to be high so we bought a pressure regulator to place on our PVC pipe. We put it on after the solenoid (between the solenoid and the garden).


After checking that all of the connections are water tight (where they need to be), we were then able to  finish off our system by setting our timer. Our sprinklers go off twice a day in the summer and once a day in the cooler months for about five minutes at a time.
No more watering by hand! We finally get to sleep in!
Score!


Friday, October 19, 2012

Mmmmm Garlic!

We went to college in the central coast of California and every time I drove to school from the Bay Area, I had to drive through Gilroy.
The Garlic Capital of the World!
If you have never been, it is a must. Just driving through on the freeway, you can tell why they call it the garlic capital. Mmmmm....It smells so good. They even have a garlic festival every summer.
It is on my bucket list...

Needless to say, we love garlic.
So we just had to try growing it. 


We simply bought some garlic heads from the store and then popped off the cloves and stuck them in the dirt. Be sure to leave as much of the paper on the cloves as possible.

The super tall green spikes is not the garlic. Those are green onions. The garlic are the thinner shoots behind them.


When over half of the shoots have gone yellow and dry, it is about time to pull them out of the ground. Don't wait until they are all dead or the garlic won't come out right.


Next, they need to be hung and dried for several weeks before they can be edible. The most common way to hang them for drying is by braiding or at least the prettiest way.


Being a girl, I do have some braiding experience.


Not looking too bad if I do say so.


It was kind of fun! Though messy. It might be best if the braiding is done in somewhere that can be easily cleaned.


Once done with the braiding is done, hang the braids up in a dry place, out of direct sunlight. Our garage worked. Four to six weeks later, we had really small garlic. 
What did we learn? Maybe next time try elephant garlic instead of store bought. Garlic is very finicky to grow, so be aware if you are going to try it yourself.
Goodluck!